HotDoodle Logo
Add a Blog

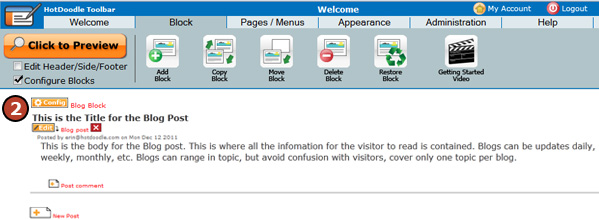
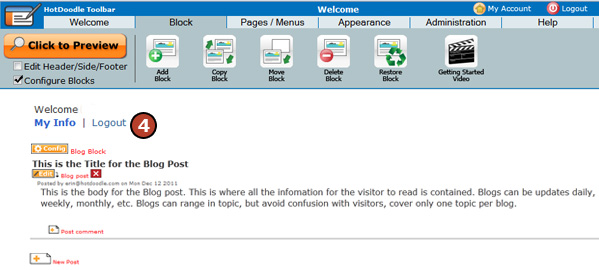
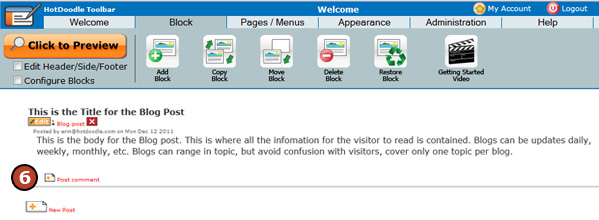
A blog or “web blog” is a series of (usually) brief comments, stories or articles presented in reverse cronological order with the most recent entries at the top. Blogs are usually updated weekly or even daily and are a way to get visitors to return to a website on a regular basis. Blogs are a quick way to continually add new content to a website. HotDoodle blogs can include formatting including fonts, images, links, and even other blocks such as calendars.

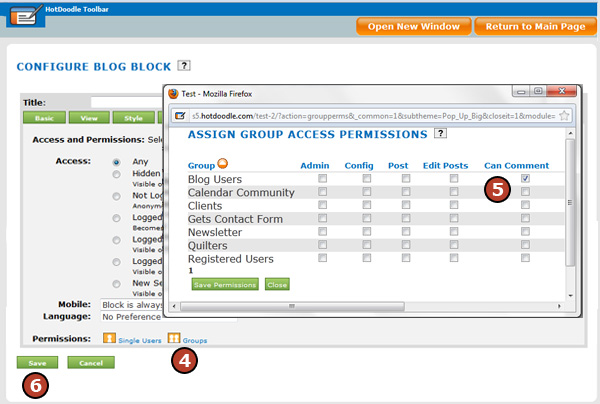
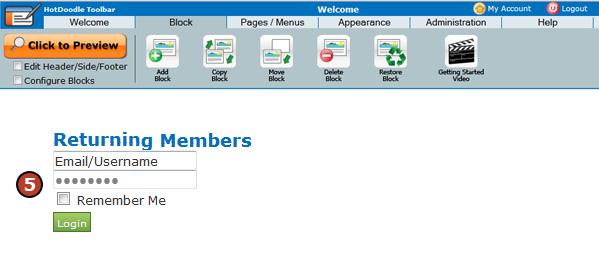
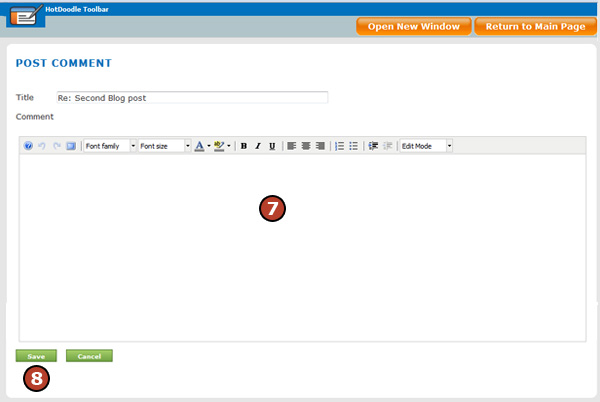
A Blog has an interactive aspect when a user of the website posts a comment on a blog post. In HotDoodle, a visitor must register and/or login to post a comment on a blog. This dynamic feature is not available on the Basic Hosting Plan, and the website must be upgraded to the Dynamic Hosting Plan to allow registration for users to leave comments on the blog. See Login and Registration

Steps: How to Add a Blog

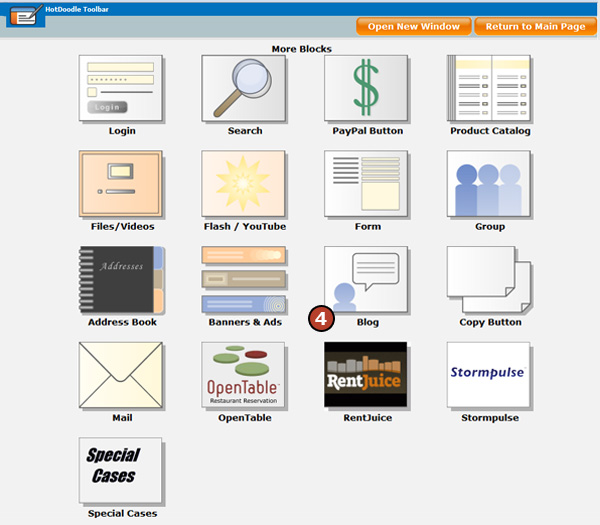
1. On the HotDoodle Toolbar, click on the "Block" tab.

2. Click on the "Add Block" button.

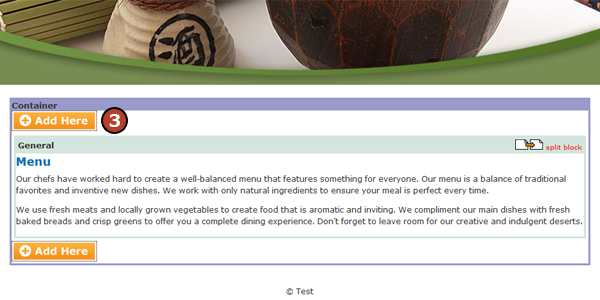
3. On the webpage, click on the "Add Here" button where the Blog Block will display.

4. Click on the "Blog" block button.

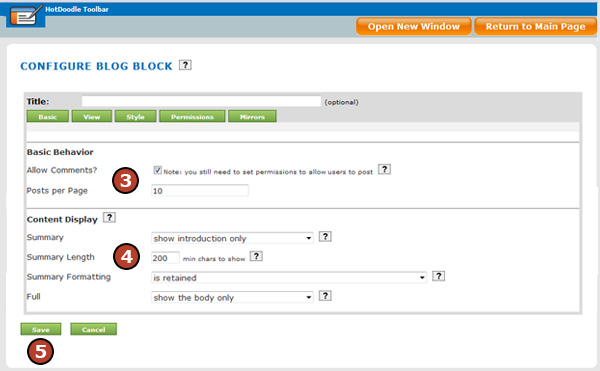
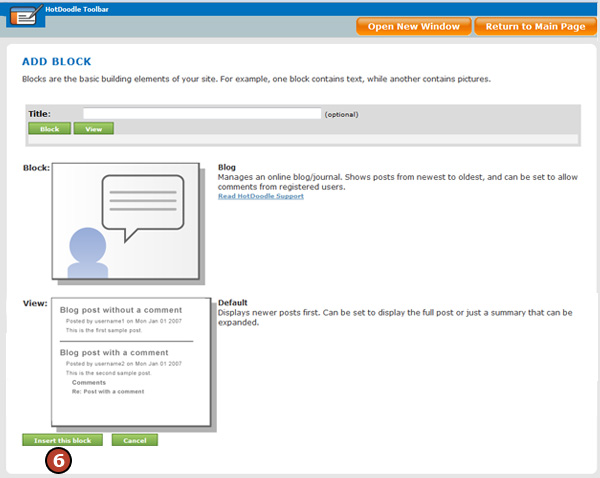
5. Click on a block view, either default or monthly display format.

The Default view lists the blog post summaries as configured.

The Monthly view lists the months as a link to all posts made in that month.

6. Click on the "Insert this block" button.


Configure the Blog Block

Steps: How to Configure the Blog Block

1. Click to add a check mark in the box next to "Configure Blocks" under the Click to Preview button.

2. Click on the "Configure Blog Block" link.

3. Select the number of blog posts will display on the page.

When the blog contains more posts than specified, a "Next" link will display at the bottom of the blog posts to allow visitors to view older posts.

4. Select how the summary of the blog post will display.

5. Click on the "Save" button.


Add Permission to Allow Comments

The Blog Block will always display an "Add comment" link when in the edit mode, but this does not mean that any users of the website can add comments to the blog. Permissions need to be granted for the user to view the "Add comment" link and be able to add a comment. The best way to assign the permission to comment is to create a group account (Blog Users) and grant blog comment permission to that group. Users can be automatically added to the Blog Users group when they register.

Steps: How to Add Permission to Allow Comments

1. Create a Group Account called "Blog Users" with the [New users members by default] setting checked. See Create Group Accounts

2. Click to add a check mark in the box next to "Configure Blocks" under the Click to Preview button.

3. Click on the "Permissions" tab.

4. Click on the "Groups" link.

5. Click to add a check mark in the box next to the Blog Users group under the "Can Comment" permission option.

6. Click on the "Save" button.


Test a Blog

For advanced and dynamic features in HotDoodle, best practice is to test before launch.

Steps: How to Test the Blog Block

1. Add a Blog Block. See Add a Blog

2. Add a Blog Post. See Add a Blog Post

3. Create a Test User. See Create User Accounts

4. Logout as the website owner.

5. Login as the Test User.

6. Click on the "Post comment" link and type in a comment. 

7. Type in a comment in the text editor.

8. Click on the "Save" button

If a comment could be posted as a test user, then the blog is configured correctly for future users.


© 2006 - 2015 Metabyte, Inc., All Rights Reserved, Patents Pending

http://www.hotdoodle.com, HotDoodle™ Custom Web Design and Quality Affordable Website Designers for Small Businesses and Professionals
Powered by http://www.hotdoodle.com, HotDoodle™ Custom Web Design and Quality Affordable Website Designers for Small Businesses and Professionals
Custom Website designs for Self-edit Sites Site Map