A form is a feature that allows a visitor to input information and send it back to the website owner, or anyone specified during the setup. Prior to adding a Form Block, create a group that will receive form submission emails. See: Create Group Accounts A form may include text areas, radio buttons, drop down menus, and/or buttons. Forms allow visitors to provide contact information, make comments about the website, or ask a question.
In addition to the form data being emailed, on the Dynamic Hosting Plan, the information entered into the form is saved in a database within HotDoodle, allowing the ability to access, analyze and utilize the information for a variety of purposes.
Steps: How to Add a Form
1. On the HotDoodle Toolbar, click on the "Block" tab.
2. Click on the "Add Block" button.

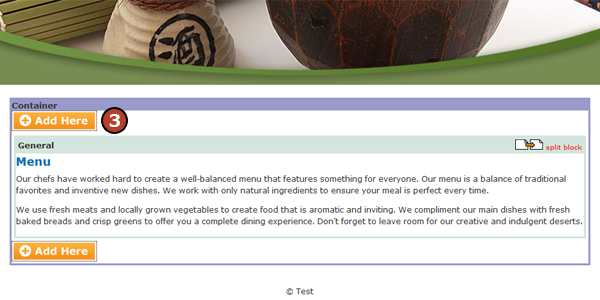
3. On the webpage, click on the "Add Here" button where you would like to add the block.
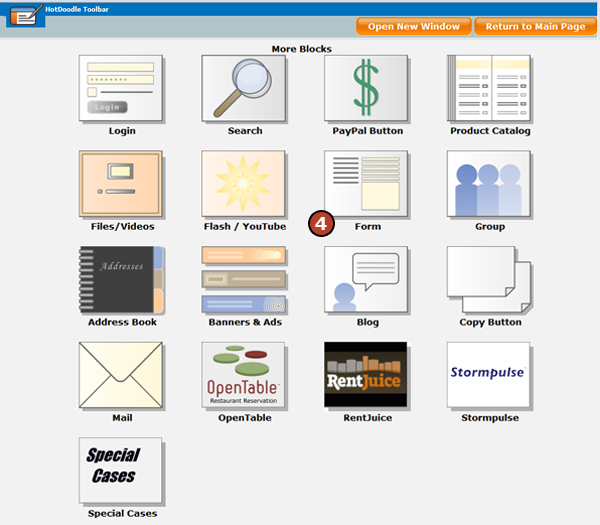
4. Click on the "Form" block.
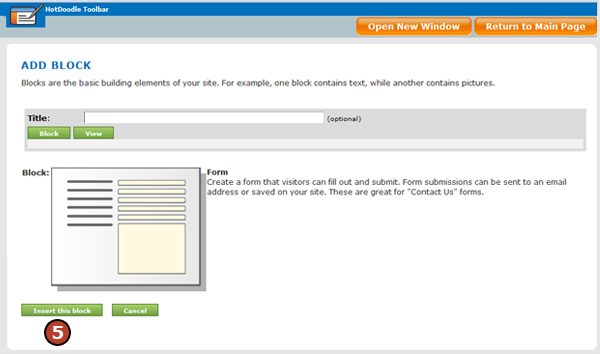
5. Click on the "Insert this block" button.
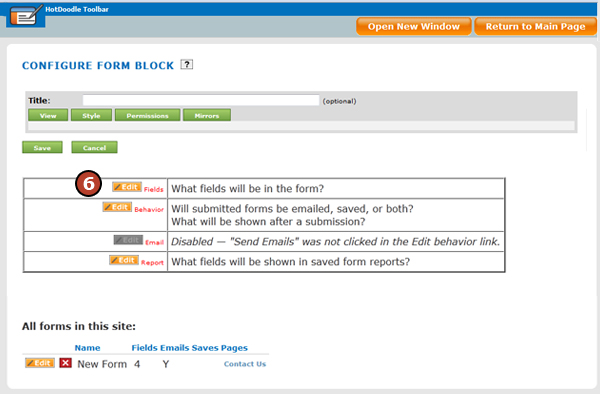
6. Click on the "Edit fields" link.
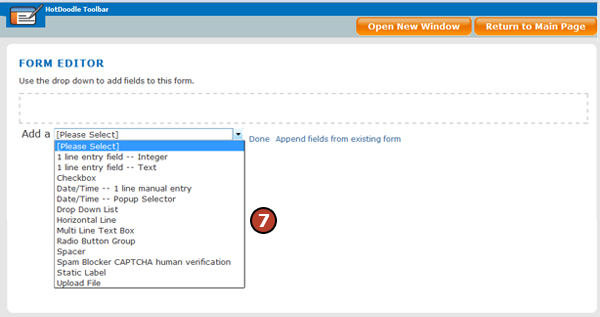
7. Click on a field option to add to the form from the drop down menu next to [Add a].
8. Complete the properties of the field.
- Type a name for the field in the Identifier box. The identifier also appears in the database and helps sort information.
- Type in a caption to explain the field to the user.
- Type a default or initial value for the field (optional).
- Type a display width to indicate the length of the field on the form (optional).
- Type in a maximum number of characters (Optional). This setting controls the number of characters the visitor can enter in the form field.
- Click the checkbox next to [Required?] to indicate the user is required to complete the field.
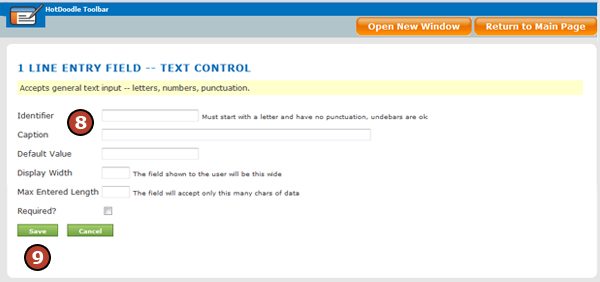
9. Click on the "Save" button.
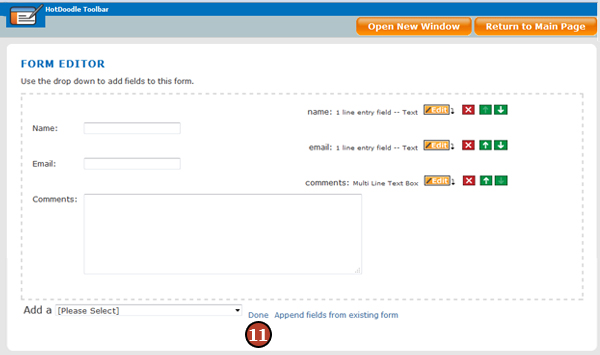
10. Repeat steps 7-9 to add all the fields in the form.
11. Click on the "Done" link at the bottom when all fields are complete.
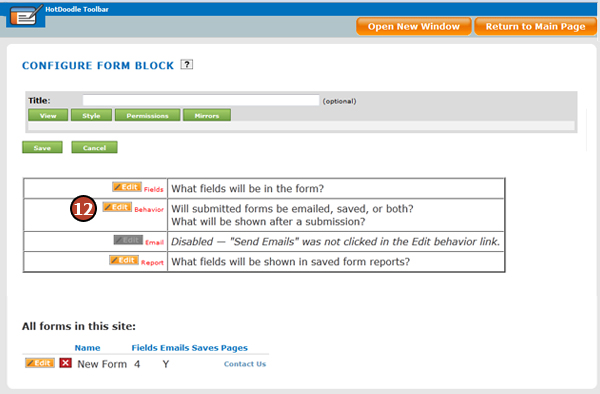
12. Click on the "Edit behavior" link.
13. Type in a name for the form.
14. Click to add a check mark next to the boxes for [Send email?] or [Save?] to determine if the form is emailed, saved, or both.
15. Type in custome text to replace the "Submit" and "Reset" buttons (Optional).
16. Type in a response message for the website to display after a form has been submitted.
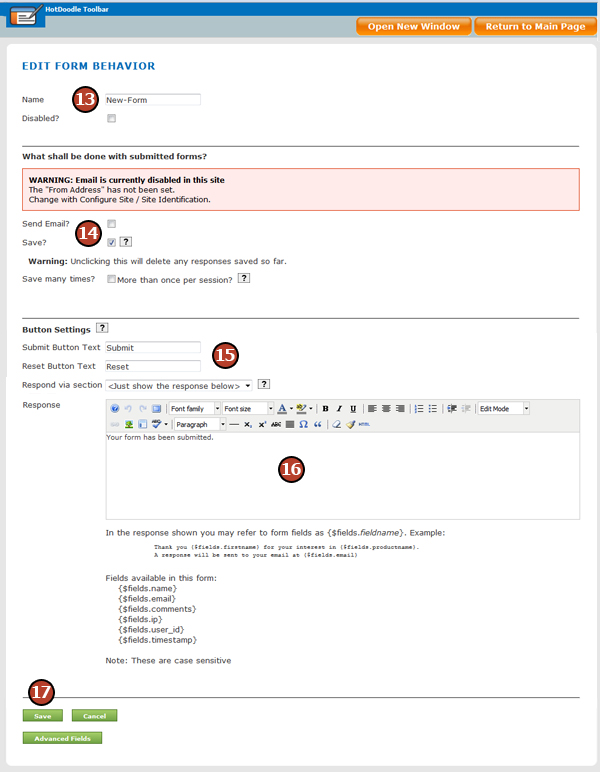
17. Click on the "Save" button.
18. If the form is being emailed, click on the "Edit email" link.

19. Type in a subject line for the form.
20. Click to select and use the blue arrows to Include Groups and Users to email the form to.
A group account must be created to appear on the list of options. See: Create Group Accounts
21. Click to select and use the blue arrows to Include the form data the email will display.
22. Type a custom email response to send to a visitor that submits a form.
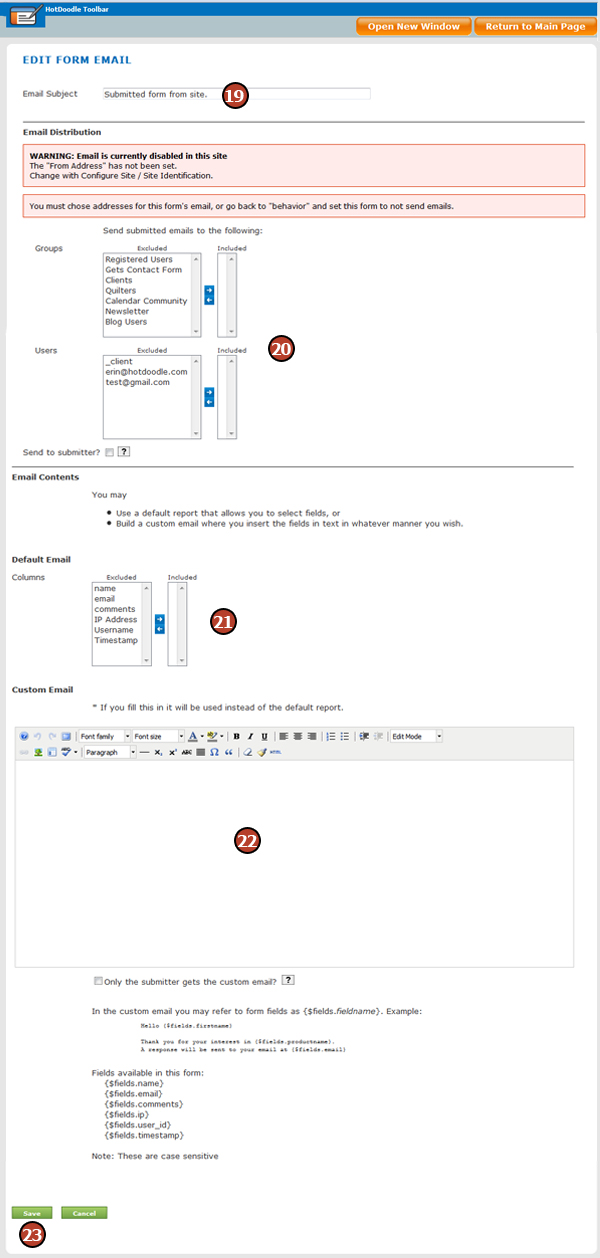
23. Click on the "Save" button.
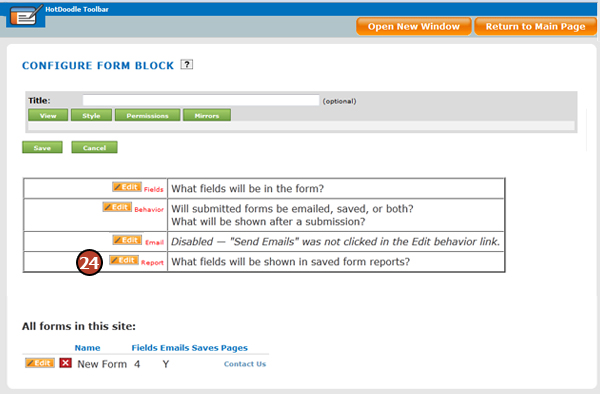
24. Click on the "Edit report" link.
25. Select the form information and use the blue arrows to Include the information in the saved forms on the website.

26. Click on the "Save" button.
27. Click on the "Return to Main Page" button.

28. on the Hotdoodle Toolbar, click on the "Administration" tab.
29. Click on the "Configure Site" button.

30. Click on the "Site Identification" button.

31. Make sure the box next to [Email Allowed?] is checked.
32. Type in a From address that all submitted forms will display in the From line.
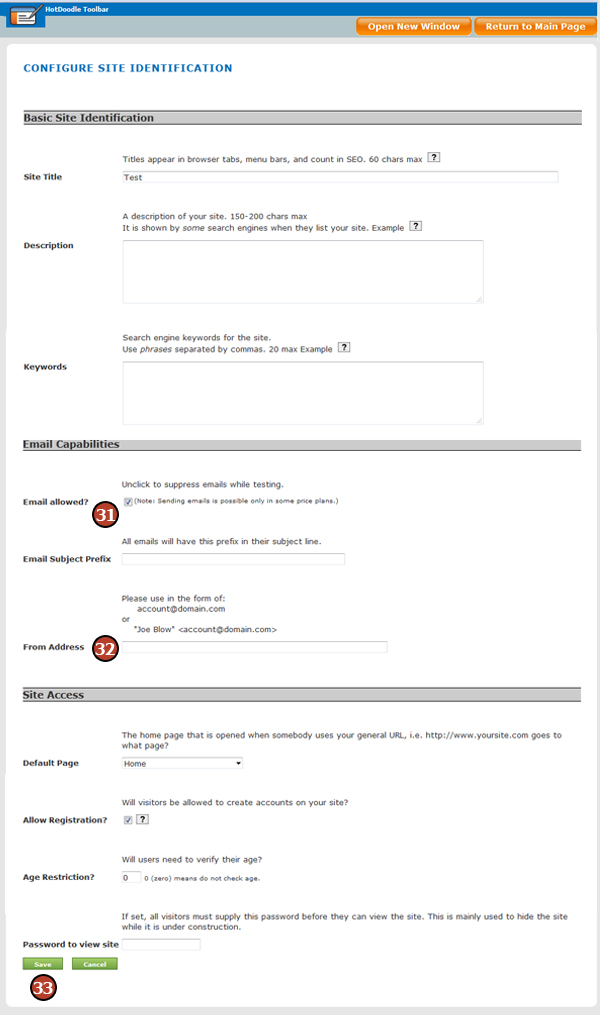
33. Click on the "Save" button. | 